Driver's Ed
Abstract
This fall semester, Princeton University is offering a new class DRI 101: Driver’s Ed. Our game, Driver’s Ed, is an infinite-runner game in which a player controls a car driving down Washington Road. Each player is given three lives (or three chances in the class), and every time they hit an obstacle they lose a life. The player uses the arrow keys to dodge the obstacles— pedestrians, crossing animals, and other cars— all while trying to collect coins. The goal of the game: get as many coins as possible without getting kicked out of the class. Driver’s Ed uses computer graphics concepts, such as polygonal meshes, light rendering, and collision modelling, to create an enjoyable and aesthetically-pleasing game for players.
Introduction
Goals
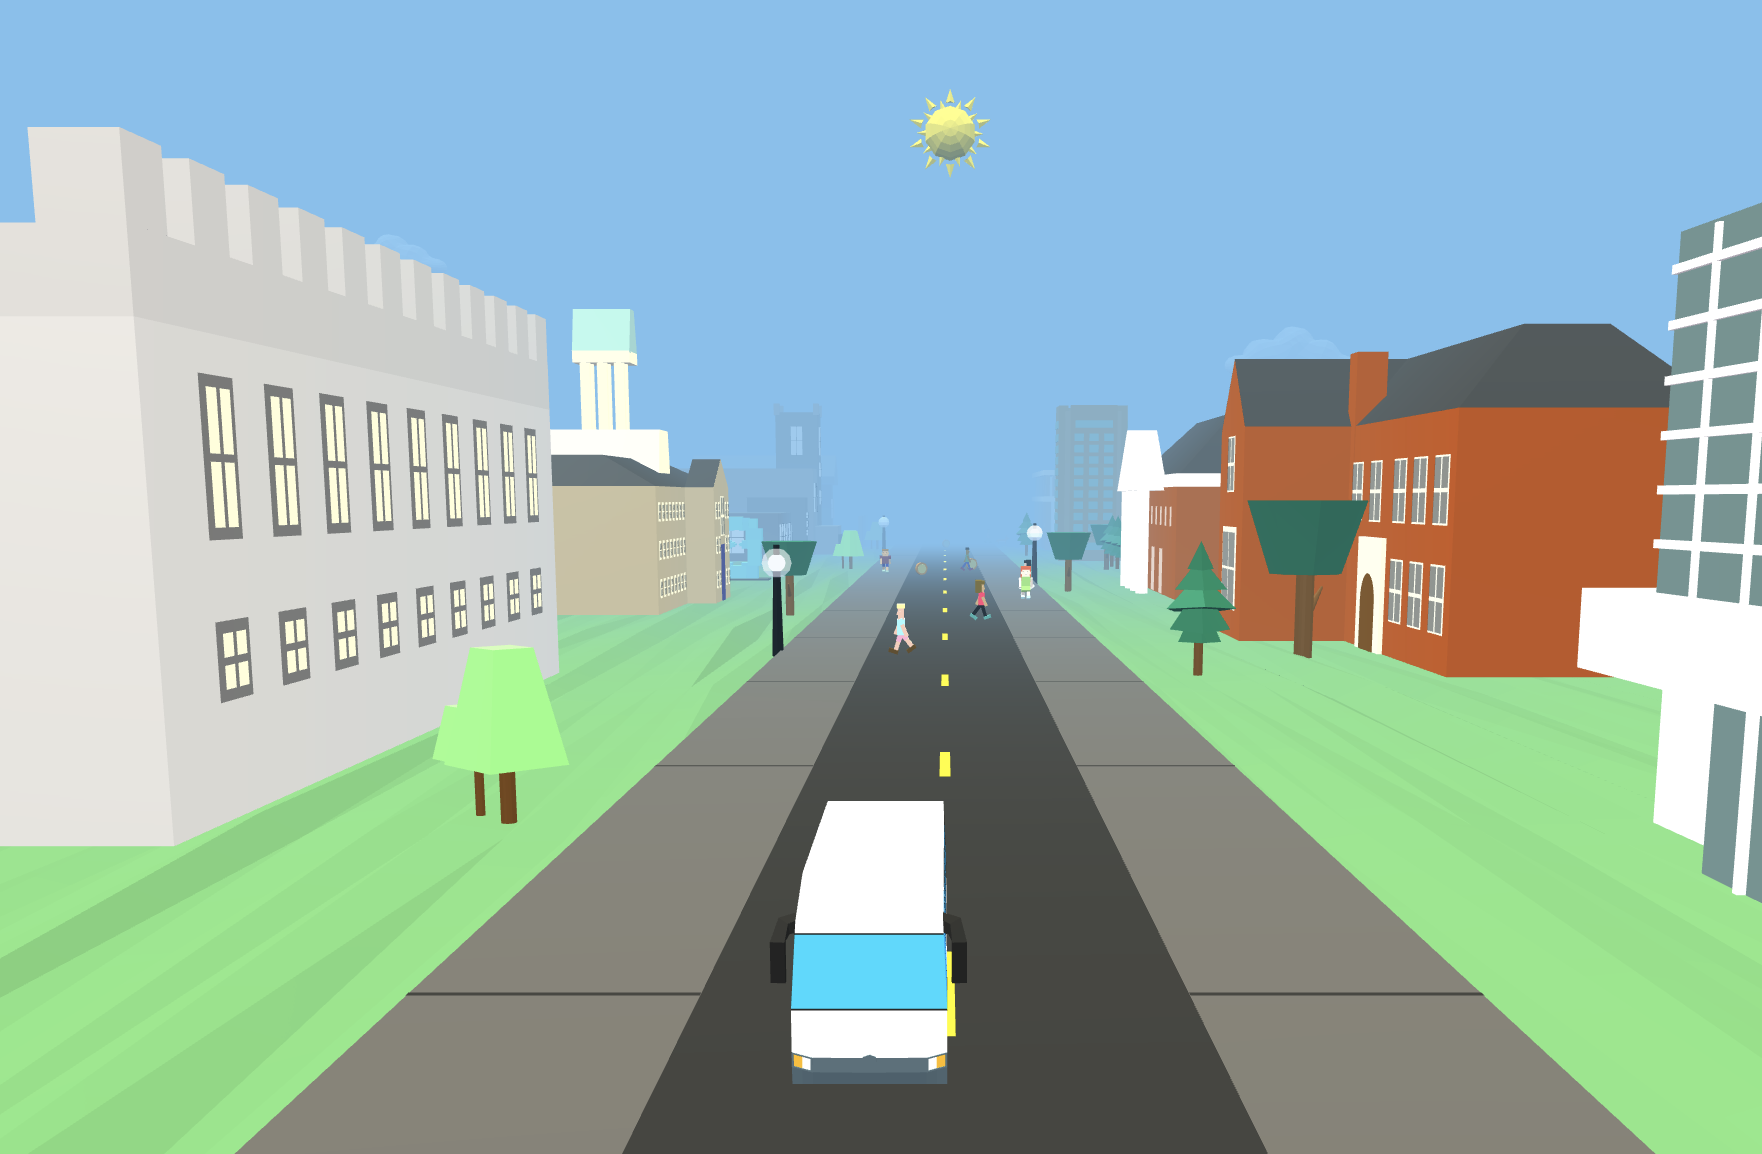
Driver’s Ed is an infinite-runner style game. The player controls a car that is driving down a rendered cartoon version of Washington Road complete with all the iconic buildings on Princeton’s campus. In making this game, we wanted to pay homage to infinite-runner games that we played when we were young, like Temple Run and Crossy Road. To do so, we created obstacles in the path of our driver, like pedestrians and animals, that the player needs to weave around as well as coins and boost items to collect. Beyond video games, we were also inspired by content covered in the second-half of the course. We wanted to invoke different lighting effects through our changing day scenery and model cartoon-esque collisions between objects. Our final product is a reflection of both our fond memories of video games from our childhood and appreciation for the computer graphics knowledge we have learned this semester.
The purpose of this game, like most video games, is to serve as a relaxing activity for the player and be a fun distraction. We thought that designing a game like Driver’s Ed is especially important given the unprecedented circumstances we are in. Having video games can make being quarantined more enjoyable and pass the time quicker. More importantly, like many Princeton students, we the creators miss being on the University’s campus and enjoying our spring semester. That is why we chose to recreate Princeton scenery and niche inside campus jokes as a means to have a bit of campus with us even though we are away from it. For example, we made roadside objects modelled after Princeton buildings, such as the Friend Center, Fine Hall, and Frist. In our obstacles, we included the campus fox— a running gag amongst students. Overall, we wanted to create a light-hearted activity that sparks a bit of joy for Princeton students during a difficult time.
Previous Work
For Driver’s Ed, we were inspired by industrial examples, Temple Run and Crossy Road, and open-source examples, Aviator and Boxy Run:
Despite the varying premises of each example, all four games share the same style where the character must stay alive as long as possible while navigating through an endless path filled with obstacles and rewards. We feel that this infinite-runner style approach is very successful, as it provides the perfect balance between stress and reward. Specifically, it keeps players on edge, makes them curious about what is about to come next, and provides instant gratification for successfully avoiding the upcoming obstacle or collecting the reward. It also allows players to get into a “zone,” a sort of relaxing, yet thrilling, flow from overcoming the dynamic challenges. Above all, these games are simple to play, with controls and goals that are easy to understand, but challenging enough to prevent players from mastering the entire game. Here, the only competitor is the player and their previous high score. There is a certain level of personal skill required and the development of this skill feels obtainable, which ensures players always come back to play.
Approach
Methodology
Implemented Features
Meshes
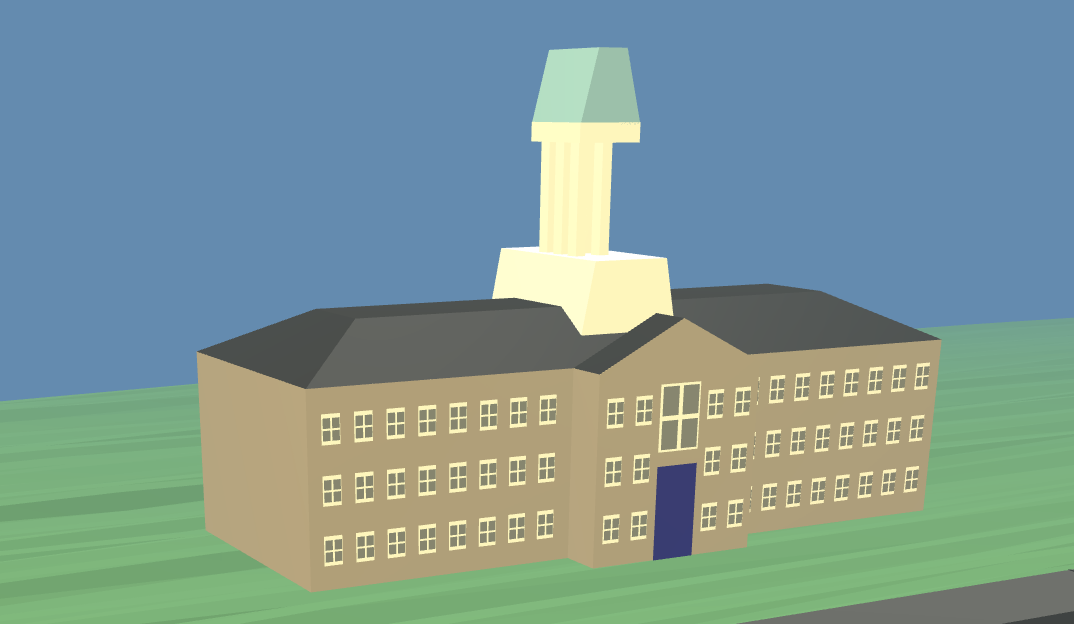

All the meshes in the game are either created from merging basic Three.js meshes or downloaded from Google Poly. While we definitely could have taken the easier route and only used existing meshes from Google Poly and other libraries, which would have resulted in a much more generic scene/game premise, we decided to make most of our meshes on our own because we wanted Driver’s Ed to be Princeton themed. This meant that all of the buildings, such as Firestone Library and Fine Hall, had to be modelled by ourselves since they simply didn’t exist elsewhere. Generally, these buildings were created by merging Three.js meshes like planes and boxes. We used MeshToonMaterial() to evoke the cartoon-esque feel that we wanted for our scenery. For the less Princeton specific meshes, such as the sun and moon, we decided to primarily rely on Google Poly since a lot of the available meshes matched our low-poly aesthetic.
Scenery
The basic game scene consists of a road/ground, with sidewalks and buildings on both sides, and a sky.
For the road / ground, we added a fog at the end of the road to create the endless feeling and conceal upcoming obstacles and scenery ahead. For a more seamless and natural looking fog, the color of the fog was made the same color as the sky.
The grass was created using a rotated green plane. In order to create a more textured look, we randomly manipulated the coordinates of the vertices so the terrain appeared to have changes in height as we drove through the scene. Other options that we considered for the grass including modelling stacked voxels, reminescent of the terrain in Minecraft. We decided against using this technique because it not only slowed down our game given the number of voxels we had to generate but also because it detracted from the low-poly aesthetic that we set for the other meshes.
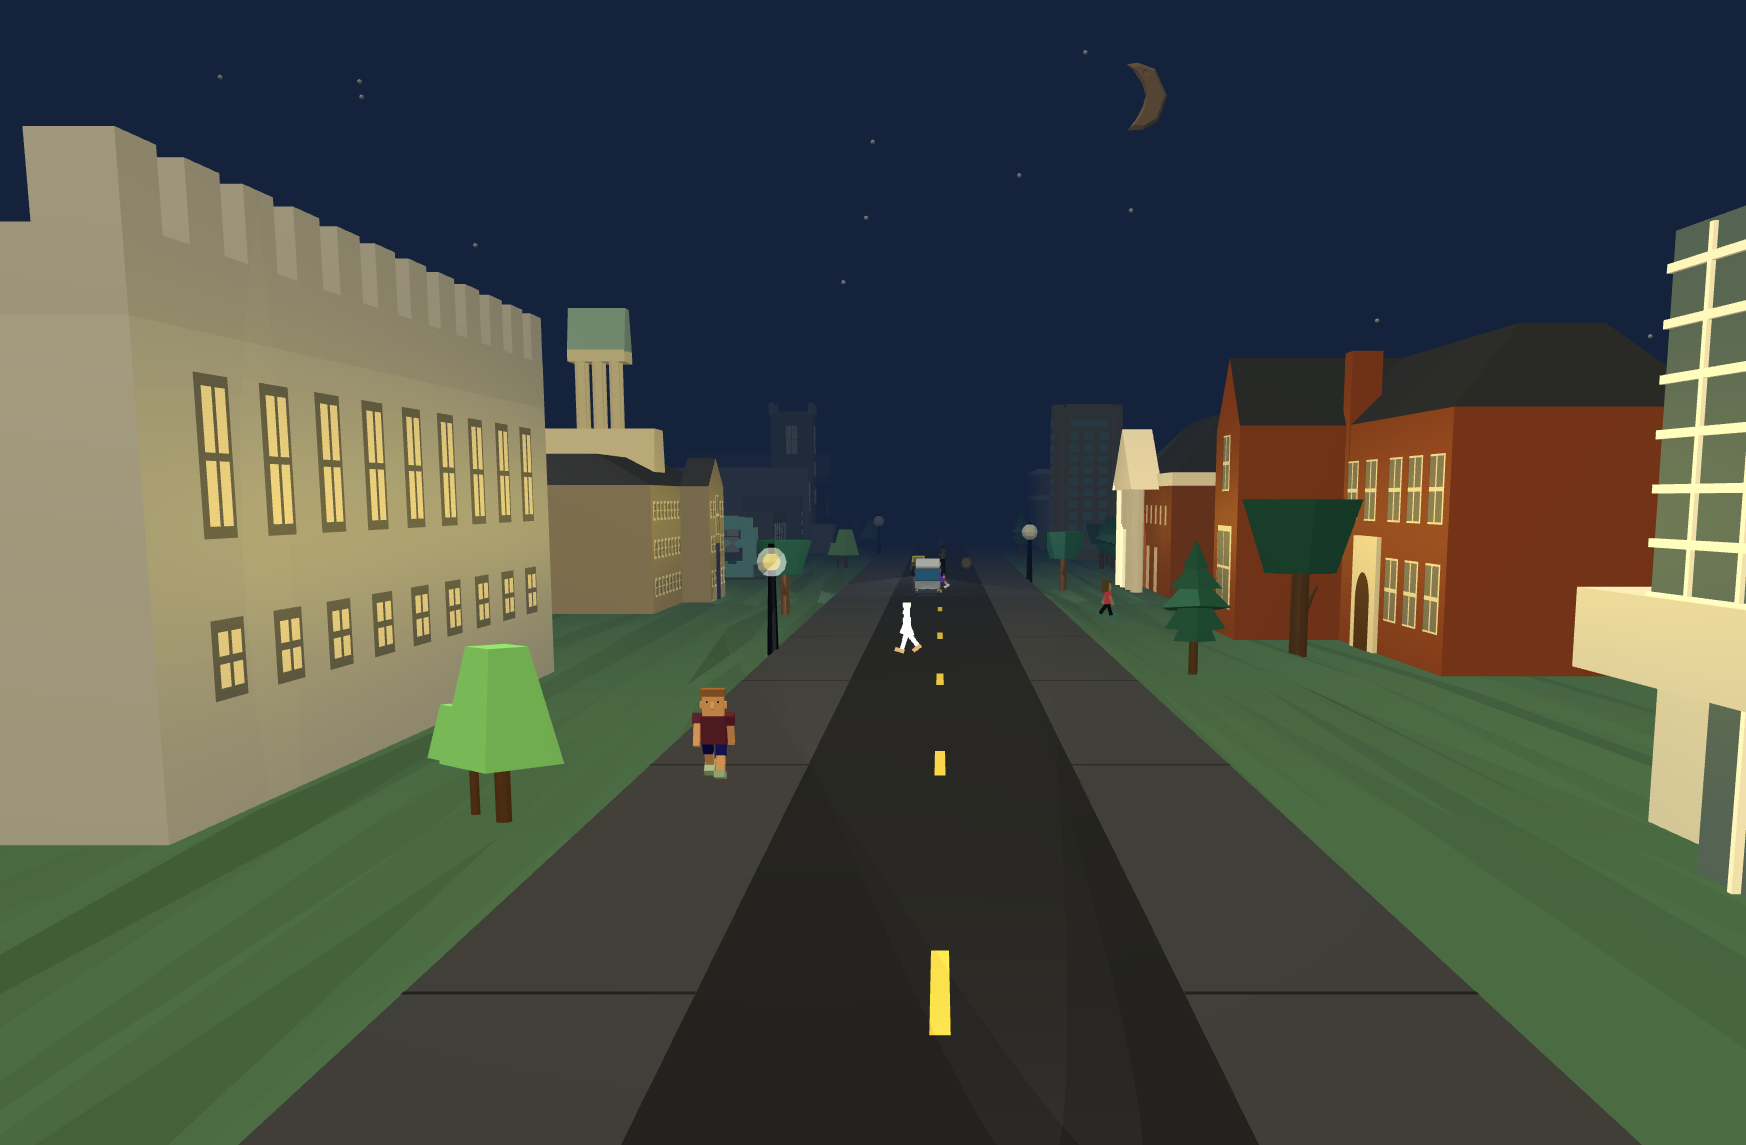
For the sky, to create a feeling of time and progression as the car keeps driving, temporal features were added to the sky. The color of the sky changes from a light sky blue to a dark blue as the time of day progresses from day to night. The exact process for this will be covered in the Night Mode section.
Furthemore, a sun and moon mesh cycle continuously in a semi-circular motion across the sky as the times of day progress. When it is dawn and day time, the sun gradually rises from the east and sets in the west. As the sun sets in the west during dusk, the moon begins rising from the east and gradually continues across the sky throughout night time before setting in the west at dawn.
While the sun and moon cycle continuously, clouds and stars also fade in and out during the appropriate time of day. When it is dawn and day time, cloud meshes from Google Poly fade in and gradually move horizontally across the screen as the sun also moves from east to west. When it is dusk and night time, the clouds and sun disappear while the moon moves from east to west and stars, modelled using Three.js sphere meshes, gradually fade in.
Game Items
There were three types of game items: obstacles, coins, and boosts. Each item had a different effect on the player when collided with.
Initially, we only planned to have two types of obstacles: pedestrians and foxes. However, during the creation process, we decided to create more obstacles to make the game more challenging and vary the scenery. In addition to individual pedestrians and foxes, we included cars that come down the left side of the road and crosswalks that have clusters of pedestrians crossing. The intention is for the car to weave around or stop for obstacles. However, if they do hit an obstacle, they lose a life. Once they lose 3 lives, the game ends.
Coins are the main incentive feature in our game. They are randomly placed along the road. The player is supposed to drive around obstacles to collect as many coins as possible.
For boosts, we have the coffee cup mesh. When the car collects the coffee cup, they become invincible for a limited time. When the car gets an invincibility boost, the appearance changes from the normal red to a holographic texture. During this period, the car will not lose lives when it collides with objects in the scene. We measured the time elapsed since collecting the item, and after, the time elapsed exceeds a set threshold, the holographic texture flickers and the car reverts to its normal state.
Car Movement
The car movement is bound to keys. We added keydown and keyup event listeners to register the key presses. The key functionalities are as follows:
1. Right arrow: move right
2. Left arrow: move left
3. Up arrow: accelerate
4. Space bar: if moving, stop; if stopped, move
Gamespeed
Everything moves with respect to the driver, so all the objects in the scene are moving towards the camera (in the positive z-direction) when the player is in motion. Objects stop or slow down to their intrinsic speed when the player stops. This speed is controlled by a gameSpeed variable native to the scene. In the default state (no auxiliary game conditions imposed), the update loop of every object increments the position of that object by gameSpeed in the z-direction.
The gameSpeed can change based on key input. If the up arrow is pressed, we simulate constant acceleration by increasing the game speed for the duration of the key press. The speed increases until the up key is released (at which point the game speed slowly decreases to its default value) or until the game speed reaches its maximum. If the spacebar is pressed, the driver halts to a stop (quick deceleration), and if the spacebar is pressed again the driver gradually accelerates back to the default game speed.
Collisions
Collisions can occur between the driver and any other gameplay object, or between any other car and any other gameplay object. To model collisions, we assign each object a bounding box and add all collidable objects to the list collidableMeshList in the scene. At each frame update, we check if there are any collisions between the driver and another collidable mesh by computing the intersection of the driver’s bounding box with the other object’s bounding box. If the two intersect, then a collision is detected. This is done by using the Three.js Box3 object methods. If a collision occurs, we call the collision function of the gameplay object to reset its position, and then subtract a life, toggle invincibility, etc. To increase efficiency, we also only check for collisions between the driver and another object if that other object has a z-position close enough to the z-position of the driver, which remains fixed.
For the other vehicles in the game, we anticipate and avoid potential collisions. This is done by detecting possible collisions in the same way as described previously, but we use a different bounding box for these vehicles which extends slightly in front of the vehicle. This allows the vehicle to detect a collision before the vehicle’s mesh physically intersects with the other object’s mesh. While such a collision exists, the vehicle stops (in the reference frame of the car), and when the two bounding boxes no longer intersect, the vehicle resumes driving.
Each object has an onCollision() function. When an object is hit by the driver, this function is called (provided it has not been called already in this collision). The exact actions in the function vary for different objects, but each object jumps up and down, and then quickly resets to a position beyond the fog so that it eventually reappears. Game actions (such as scoring, losing lives, gaining special boosts) are controlled in the frame update loop of app.js.
Night Mode
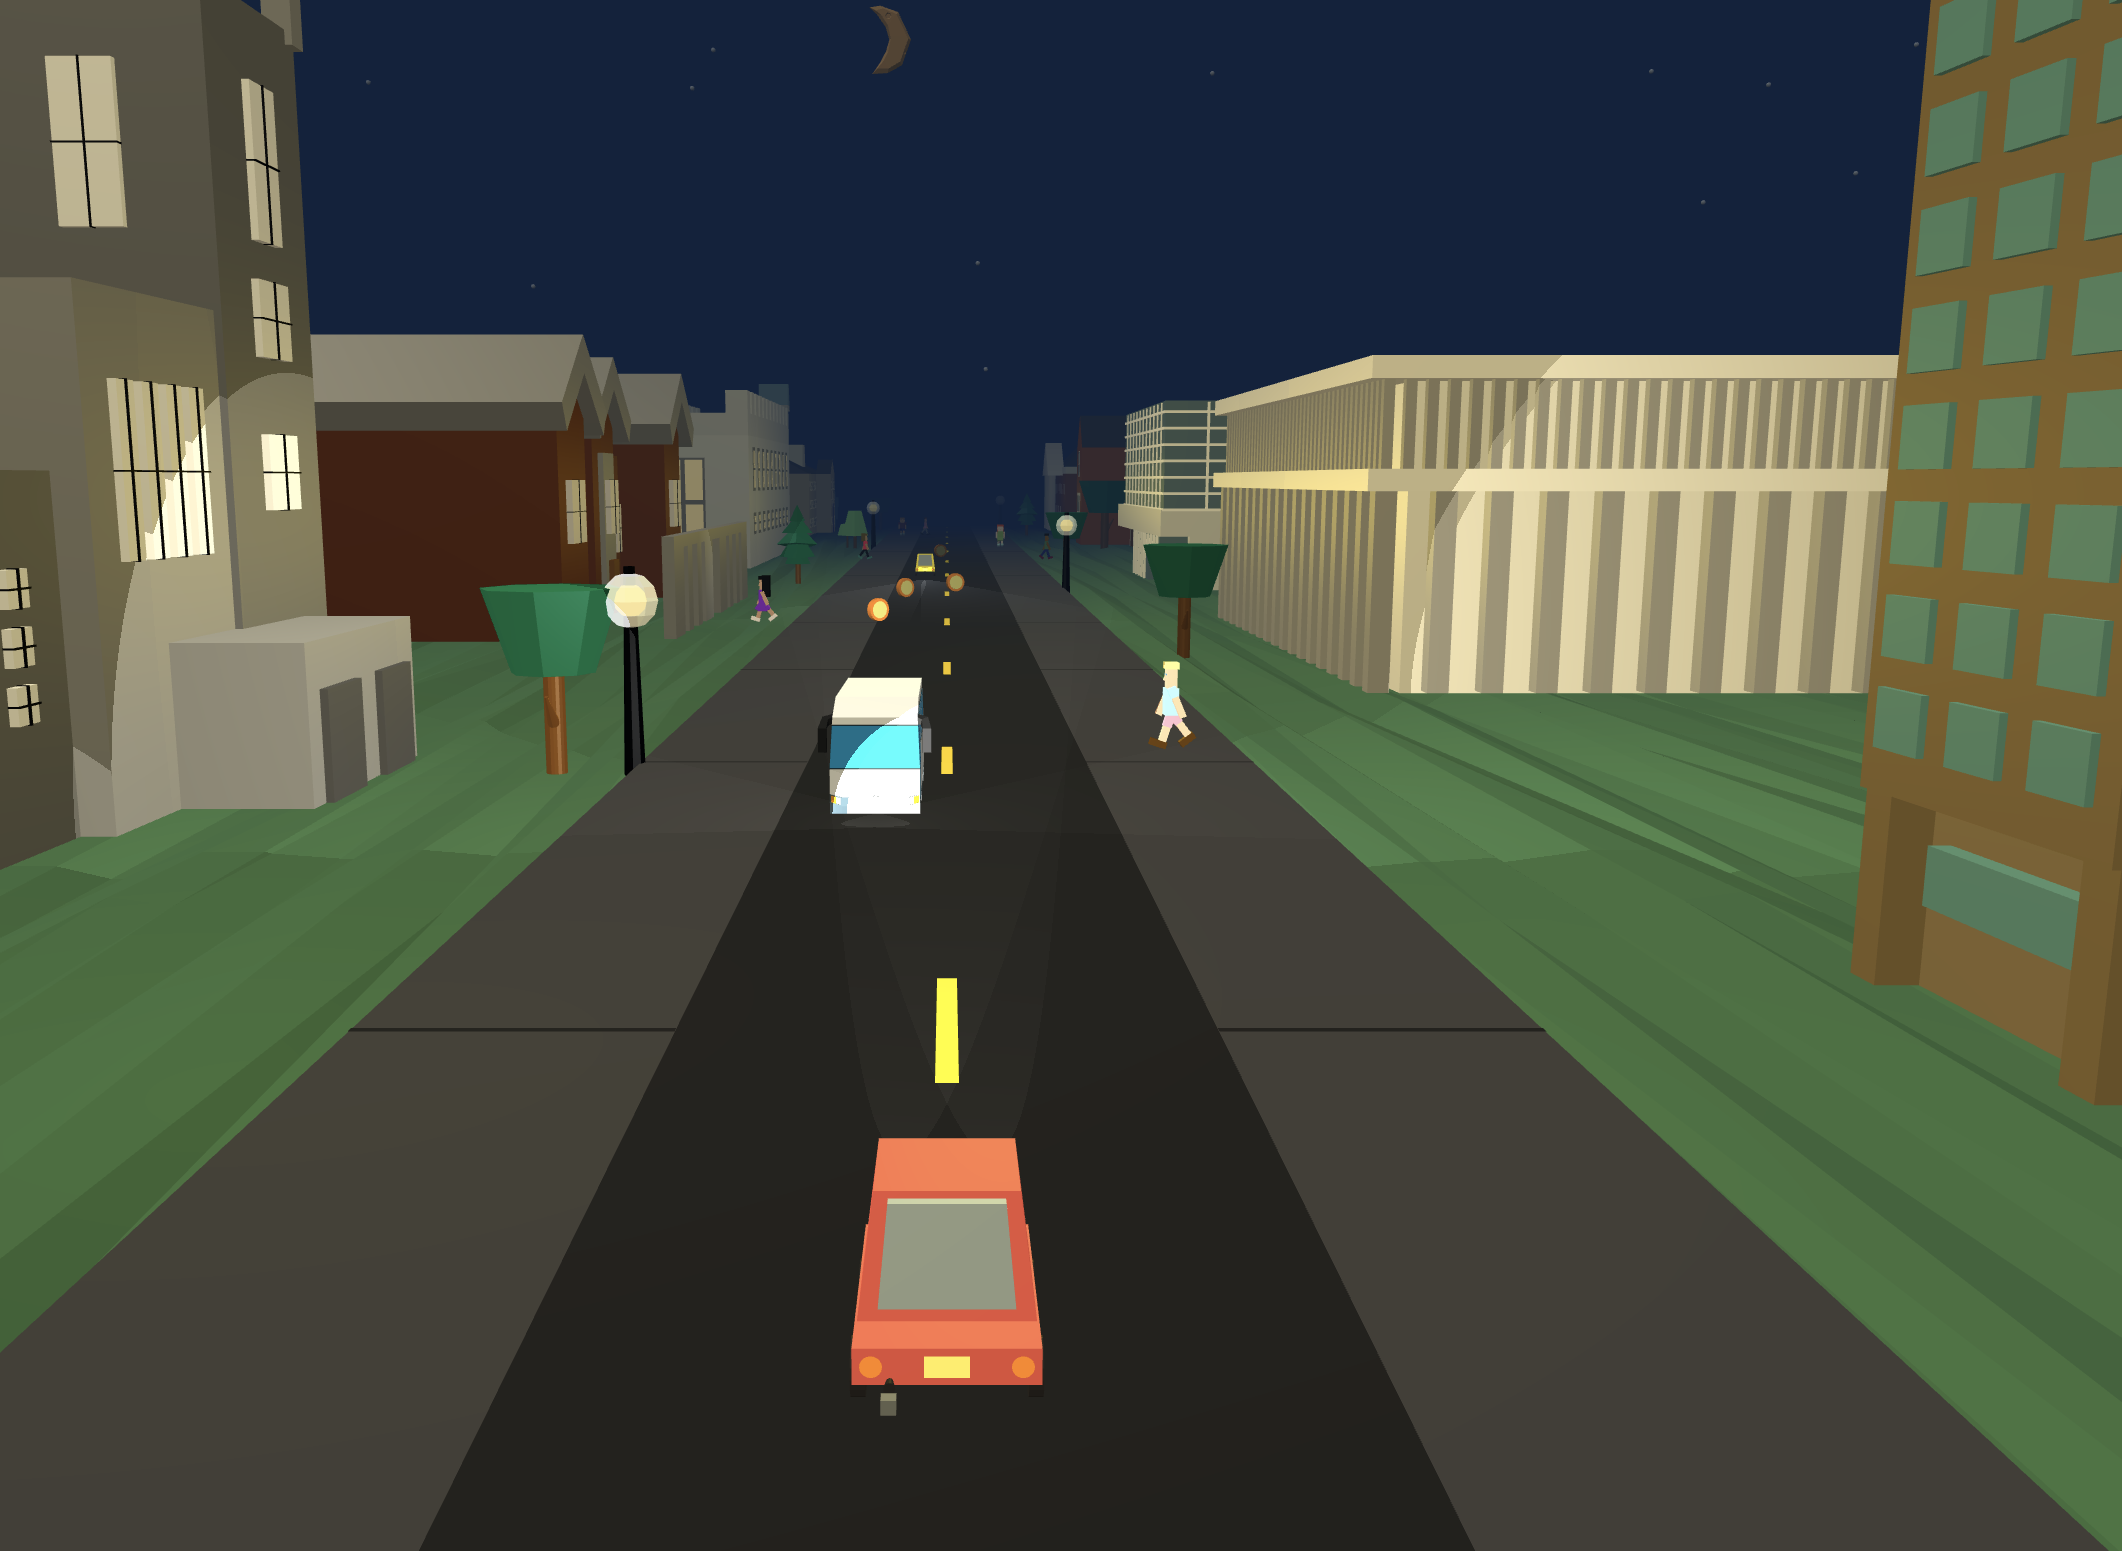
There are four stages of day that we modelled: day, dusk, night, and dawn. The goal is to emulate the lightening and darkening stages in an actual day . During the day stage, we have the background set to #7ec0ee and the hemisphere light intensity set to 1.5. Similarly, during the night stage we have the background set to #11223d and the hemisphere to 0.5. During dusk and dawn, we are changing the sky color and light intensity between the day and night values using linear interpolation.
We also included streetlights and headlights for the car that are activated. The bulbs of the streetlights are modelled as PointLights that sit inside an opaque sphere mesh. Halfway through the dusk stage, the intensity of the lights begins to increase to represent the lights gradually coming on at night. The color of the bulb also changes from white to yellow as another means of representing the light growing stronger.
The headlights of the car are modelled as SpotLights. To emulate the conical shape of light from headlights, the angle was restricted to 0.1. Unlike the streetlights which gradually come on, the headlights only turn on during the night stage. We chose to do this because this more closely mirrors how headlights are used in real life, and the aesthetic effect of the sudden switch provides a salient contrast to the dark background.
We transition from one stage to another by measuring the time elapsed. When the player hits the begin button, we take the start time and for each timestep after we find the current time. If the time elapsed is greater than our threshold, which is set to 10, we transition from one stage to another and we recalculate the start time at the beginning of the new stage. When the player pauses the game, we adjust the start time so that the time elapsed does not change.
Sounds
We implemented sounds in 6 scenarios:
For each of the scenarios, we looked for 8-bit sounds online and downloaded them in .wav files. Then we created HTML Audio objects with the .wav files, calling play() when they were needed. Hitting coins and objects was a special case. It’s possible to hit multiple coins or objects in a row. We ran into the problem where if you hit a second coin before the first coin’s ding finished playing, the second coin’s ding would not play. To get around this, instead of directly calling play()on the Audio object, we loaded the object right after initializing. Then for coins and objects, we created a clone of the loaded Audio object and called play() on the clone instead.
Challenges
Collisions
One challenge in modeling collisions was enabling the other vehicles in the scene to drive in a “smart” way, avoiding all the obstacles that the player can crash into. The hardest part of this task was making sure that the cars piled up like typical traffic when one car stopped, rather than having them pass through each other. The collision detection did not give us direct control over which car in a collision was the car in front and which one was the car behind, so we had to carefully work through case-by-case logic for these instances and check what order our objects were in on the z-axis.
Another challenge when working with collisions was preventing double scoring. That is, after a coin is hit, it jumps up to indicate that it was collected. However, sometimes the coin would register a second collision when it came back down, giving the player an additional point. This occurred with pedestrians as well, and the player would lose two lives instead of one for hitting a single pedestrian. We worked around this by resetting the collision state of the object only after the animation tween was completed, and applying a long enough delay to those tweens so that the reset occurred only once the collided object was in a position far away from the driver.
Night Mode
One challenge in creating night mode was creating a smooth transition from day to night and night to day. Originally, we only had two modes, day and night, and tried transitioning from the light sky blue to the dark blue manually with hardcoded offset values and intermediate gradient sky colors. This was unsuccessful because the outcome transition was choppy and not visually appealing. We overcame this by adding two additional modes, dawn and dusk, and setting thresholds/time limits spent in each mode. Using the time limit thresholds, we also kept track of the elapsed time from the start of the mode and used the ratio between the two times to linearly interpolate between the sky colors we desired. With this method, we ended up with a much smoother transition and had more control over the time spent in each mode. A similar approach with interpolation was also applied to the dimming of the lamp post lighting for its smooth transition into night mode.
Optimization
We wanted to optimize the game so that we could minimize lag. We started by merging our meshes together. Since we created our own meshes, they had a lot of children parts that were not combined. To reduce the number of geometries that had to be rendered, we merged them together. While this helped somewhat, we still had room to improve. Next, we reduced the number of grass, sidewalk, and road planes. We initially had more than one to create the moving effect. However, we decided to cut back on this and mimic the effect by moving different features on the planes instead. Finally, we originally had 12 street lights in the scene, each with their own PointLight. Since additional lights slowed down our game, we reduced it down to 6 lights, which improved our runtime. While we believe the game can continue to be optimized, we believe the steps we took greatly improved the speed of the game.
Results
We measured success during the creation process by playing the game ourselves and making any changes that we saw fit. For example, in early iterations of the game, we originally planned to only have the pedestrians and foxes as potential obstacles. However, after playing it ourselves, we found the game to be too easy, which inspired us to add more meshes, like the crosswalks and other cars on the road in an attempt to make the game more lively. Given that we fall within the target audience (i.e. Princeton students) of this game, we felt that play-testing the game during the initial phases was an adequate reflection of the opinions of actual potential players.
After implementing the features we wanted and creating a game that we were satisfied with, we shared our game with peers to get feedback. Getting outside advice was important to us because we wanted to see how outsiders who had not been part of the game development process reacted to our game. We sent our game link out to other Princeton students that we knew. In general, the feedback that we received was positive. In particular, people were impressed with the amount of detail and the Princeton-specific meshes that we included in the game. We consider the game a success given the amount of people who told us that the game was “extremely fun to play” and even “addictive”. Some constructive feedback we received was related to additional features, such as a background song or including an incentive for faster speed. Also, there were comments about lag time for different computers, leading us to do more optimizations on our game.
Overall, the results were positive and indicated that the we had fulfilled the goals we set out to accomplish (i.e. making a fun game and reminding people of Princeton).
Discussion
Our infinite runner game simulated driving by holding the driver constant and moving the objects in the rest of the scene towards the driver. Overall, we believe our approach to this worked out well, and it was the most straightforward to implement, allowing us to think about alternative add-ons. An alternative direction would have been to hold the scene static, and move the driver and the camera forward, until we reach the end of the scene plane at which point we would move the entire scene forward. Experimenting with this game structure could be done in the future to see if it reduces lag.
We learned a great deal about the Three.js graphics library while doing this project, as well as basic game development. We also learned just how acute the issue of frame rate can be in computer graphics. While our game consisted of a single simple scene, the frame rate and lag had a huge variance across different machines. Going through the optimization stage of development really taught us how resourceful we must be with our computations.
Conclusion
We implemented all of our target goals and several of our stretch goals, including a few that we added along the way. Some of our target goals included achieving a consistent low poly aesthetic, modeling many of the recognizable buildings on Princeton’s campus, and implementing all the basic features of an infinite runner game. We also fulfilled our main stretch goal of adding in a night mode. Seeing the game grow from a few disjoint meshes and moving cubes to a scene of the campus we left behind this semester was a great experience, and we are very happy with our final result.
Given more time, we would like to augment the scene with more “Princeton” and maybe even include small Princeton-related easter eggs. Additional challenges could also be added to the game, such as an increasing number of obstacles or a gradually increasing game speed. A great way to expand the scope of the game would be to keep track of high scores with a backend. Certain things could also be improved, such as the collision model for vehicles. There could also be more modularity introduced into the code, to avoid repeated variables and initializations. For example, a more global framework for detecting collisions should be written so that similar object-specific collision behaviors do not need to be repeatedly coded for each object.
Contribution
In doing this final project, we distributed the work evenly amongst the four members of the group. We started by dividing in half with two people working on the meshes and two people working on the initial game logic. Brandy and Dora created the custom Princeton meshes (e.g. buildings, pedestrians, fox, etc.) and Karen and Sharon worked on developing the initial game logic. Through this division of labor, we were able to create a moving scene with custom meshes two days into the process.
After completing the initial step, we came back together and divided tasks for individual parts of the project. Sharon modelled all of the collisions in the game and the animations that occurred after objects collided. She also figured out how to have the car accelerate and decelerate using key events. Karen wrote all of the HTML/CSS parts of the game, combined the meshes we created into the game scene, and incorporated sound. Brandy created the scenery, like the sun / moon cycle, placed objects such as coins into the game, and created more custom meshes (e.g. trees and statues) to flesh out the scene. Finally, Dora worked on developing the night mode effects, such as creating illuminated street lights and headlights, in addition to working on the invincibility boost. We all helped each other debug and provided constructive feedback throughout the process.
At the end, we came together to work on optimizing our game and writing the final report. We thought that dividing up the tasks in the manner that we did allowed us to maximize our strengths during the game creation process. Overall, we felt that our division of labor led to higher productivity levels and particularly fruitful results.
References
Sounds
Meshes
Libraries
Open Source Code
Works Cited
- Blue, Lewy. "The Big List of Three.js Tips and Tricks!" Discover Three.js, https://discoverthreejs.com , 1 Oct. 2018, discoverthreejs.com/tips-and-tricks/.
- Delallana, Carlos. "Mobile Games: Why is Temple Run so Popular?" Quora, https://quora.com, 4 Feb. 2013, www.quora.com/Mobile-Games-Why-is-Temple-Run-so-popular.
- Nguyen, James. "5 Psychological Reasons Why User's Can't Stop Playing Disney's Crossy Road" Forbes, https://www.forbes.com, 25 Oct. 2015, forbes.com/sites/nguyenjames/2016/10/25/5-psychological-reasons-why-users-cant-stop-playing-disneys-crossy-road/#30f17bf5a155